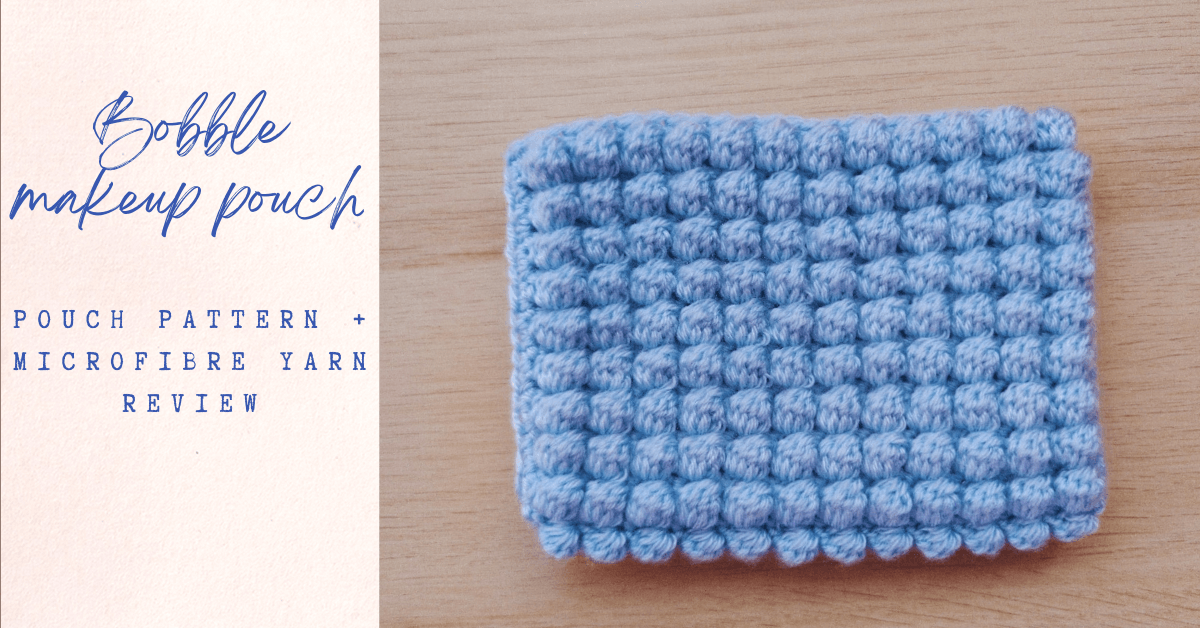
A handmade pouch with personality? Yes please! Crochet This bobble pouch is ideal for holding travel minis, everyday essentials, or that lipstick you can never find at the bottom of your bag.
The story behind this pouch is actually a special one—my sister made the first bobble pouch I ever saw, and it was absolutely amazing. She ended up creating several more as gifts, and everyone loved them! That’s when I decided to give it a try myself, and I’m so glad I did.
In this blog post I will share the step by step pattern for a bobble pouch .This pouch is made as a single piece and then sewn from the sides. The pattern uses bobble stitch explained in this video.
Materials
For this crochet pouch, I used a DK (medium-weight) microfiber PC yarn. However, the pouch will look just as beautiful in acrylic or cotton yarn.
I worked with a 4 mm crochet hook and used less than 100 grams of yarn for the small size.
To help you visualize the finished dimensions, I’ve added a handy size table below.
| Chains | No. of Bobbles (in width) | Size (width x height) |
| 26 | 12 | small (5.5 x 4.5 inches) |
| 30 | 14 | medium (6.5 x 5 inches) |
A small sized pouch can easily carry normal makeup items like a lipstick, blush, jewellery and credit cards. The medium sized version looks more like a clutch and can also be used as a accessory by attaching a wristlet.
Yarn spotlight 🧶(Microfibre yarn)
I used Lanners Microfibre PC yarn for this crochet pouch, and I wanted to share a few thoughts about it.
This yarn has a smooth, silky texture that gives the pouch a soft feel and a subtle sheen. It’s also strong, lightweight, and resistant to pilling, which makes it perfect for projects that need to handle everyday use — like dishcloths, pot holders, or drying mats.
Although it’s technically listed as an acrylic yarn, I found it to be much softer and finer than standard acrylic. It feels light and smooth, making it an excellent choice for year-round crochet projects.
Pattern
This tutorial assumes the knowledge of single and double crochet.
US Stitch Terms
abbreviations
ch – chain
sc – single crochet
dc – double crochet
Pattern Begins
Row 1: Ch an even number ( here I have chained 30 i.e. 29 chains and 1 turning chain)
Row 2: then sc in each of the ch below and at the end of the row ch 1 and turn your work

Row 3: make a sc in the first stitch and then make a bobble in the next stitch, To make a bobble
1: Yarn over, insert hook into the next stitch, yarn over and pull up a loop (3 loops on hook).
2: Yarn over, draw through 2 loops (2 loops remain on hook).
3: Repeat steps 1–2 a total of 5 times in the same stitch (you will have 6 loops on hook).
4: Yarn over, pull through all 6 loops.
5: Chain 1 to secure the bobble.
make a sc in the next stitch
Alternate between a bobble and a sc
At the end of the row, ch 1 and turn your work


Row 4: sc in each of the stitch below

Row 5: after reaching a desired number of rows ( in my case 19 rows of bobble and sc each). Turn the project inside out, and make a sc in each of the outer loops.

After doing sc in the outer loops, the right side will look like the image below.

Row 6: After joining both sides with sc, make a sc on top of the pouch for a uniform and finished look.
To Conclude
Weave in loose ends and that’s it — your bobble pouch is complete! I love how the texture of the bobble stitch makes such a simple project look so stylish. Don’t forget to share your version if you make one. In the next few blogs I will also share how I add lining and zipper to my pouch for a finished look.
Signing off until the next post. Happy Crocheting 😊
© 2025 NoiceThreads. All patterns and photos are my original work.
You’re welcome to make and sell finished items — please credit NoiceThreads and link back to noicethreads.com
Please don’t copy, repost, or distribute the pattern instructions or photos without permission.
Thanks for supporting handmade creativity! 🌿✨


