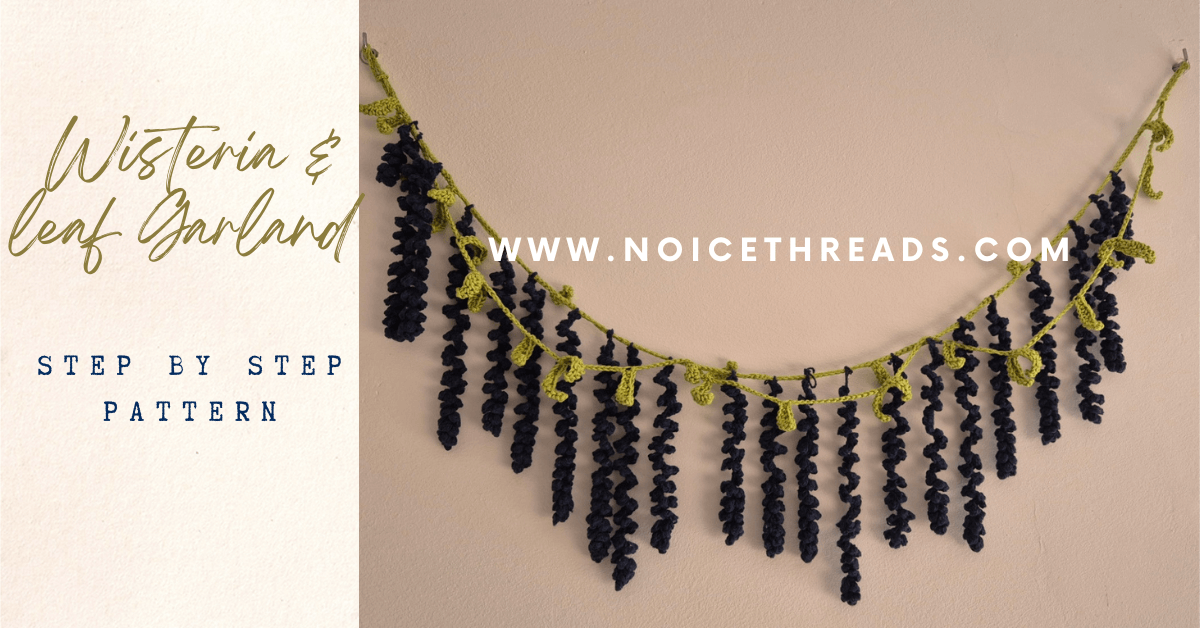
I’ve been seeing so many beautiful crochet leaf and wisteria garland on Pinterest lately that I couldn’t resist making one of my own. I’m now working on a crochet pattern inspired by those lovely blooms — perfect for adding a touch of handmade charm to home décor. I first saw wisteria when I was watching Demon Slayer and I thought to myself what beautiful animation. Even though wisteria are actually shown purple in the show. However, I have used dark blue for my project because I wanted to use up my yarn stash. So lets dive into the pattern.
Sometimes it’s easier to see how it’s done rather than just read it, right?
Here’s a quick video where I show exactly how I made this Crochet Wisteria Garland. Grab your yarn and hook, and let’s crochet together!
Materials
For this project, I used a recycled cotton yarn — Katia Blue Jeans III in the colour 106 for the wisteria, It was a bit tough to work with and is probably good for summer clothes but I wanted to use something from my stash. However, I think an acrylic yarn like hobbii’s crafting Acrylic or a different type of cotton yarn would also be a great choice, especially if you prefer a fuller look. For the leaf garland/ wine I used Drops Safran in the colour 31.
You’ll also need a few basic tools:
a tapestry needle for weaving in your ends.
a 3 mm crochet hook (this size works well with lightweight yarn) for both the wisteria and the leaf garland.
a pair of scissors
Pattern
This pattern uses U.S stitch terms and you can adust the chains to make the wisteria longer or shorter.
abbreviations
ch – chain
sc – single crochet
hdc – half double crochet
dc – double crochet
slst – slipstitch
Wisteria
Row 1: Ch 60
Row 2: In the 3rd ch from the hook, make a slst , dc and then again a slst all in the same stitch.

In the next ch, again make a slst, dc and slst. keep on repeating this and you will notice that the ch is starting to curl.
At the end of the ch, you will end with a slst and pull up a nice long loop and cut the yarn, now you will have two strands of thread ( one for starting a slip knot and the other one you cut). Secure these two threads together by tying the knot 2 – 3 times.
and that’s all making the wisteria is very simple.
Leaf Garland
For the garland I crocheted a very long chain or about 60 inches.
Step 1: ch 15 .
Step 2 : To make a leaf , sc in the second ch from the hook. Make a sc again in the next stitch. Then make a hdc. Two dcs in the next 2 stitches. hdc, sc respectively in the next stitches. To finish the leaf make a slst in the next stitch.

Now you can chain however long you want and again repeat the above step to make another leaf.
Step 2 : To make 2 leaves together side by side. repeat Step 2 to make the first leaf then ch 8 and again repeat Step 2. To finish the 2nd leaf slst in the main chain. Then pass the hook in the center of 2 leaves and make a slst.

Then continue chaining to grow the garland as long as you want.
Assemble
I have made about 22 Wisteria and 2 garlands ( One to hang the wisteria on, and the other to wrap around).
To attach the wisteria on the leaf garland simply tie it using the 2 threads. secure the threads properly by tying it back and forth and then when you are confident just cut of the hanging yarn. Tie your wisteria in different places and fill the garland.
For the 2nd garland just wrap it around the first one very loosely, create a knot on each side of the first garland using the second one. Make sure to make the second garland abit bigger than the first one.

If you want, you can attach another leaf garland in a darker green colour to create a very beautiful wall hanging. I am attaching this on the nails that were already there in my home but you can also use scotch tap or maybe the hooks that stick on the wall to hang these.
That’s all for this pattern, comment and let me know how this was because I really enjoyed writing this one.


